
How to Add Auto-Synced Subtitles to Your YouTube Video No Editing Required
Subtitles are one of the highest-impact improvements you can make to a YouTube video. They help viewers who watch without sound, they improve accessibility, and they keep people watching longer. The problem is timing subtitles manually is tedious. Here is how to generate perfectly synced subtitles automatically — and burn them directly into your video.
Why subtitles matter for YouTube performance
of Facebook and Instagram video is watched without sound
Same behavior carries over to YouTube
longer average watch time on videos with subtitles
Viewers follow along even with audio off
higher engagement rate for captioned videos
Based on multiple platform studies
Beyond watch time, subtitles help YouTube understand what your video is about — which improves search ranking. A video about "compound interest" with subtitles that include the phrase "compound interest" multiple times is easier for the algorithm to categorise correctly.
Two types of subtitles — and why burned-in wins for faceless video
Uploaded SRT file (YouTube captions)
+Searchable by YouTube
+Viewer can toggle on/off
–Plain white text only
–No styling control
–Often disabled on mobile
Burned-in subtitles (hardcoded)
+Always visible
+Full style control
+Word-by-word highlight
+Works on every platform
–Cannot be toggled off
–Larger file size
For faceless YouTube videos and short-form content, burned-in subtitles are the better choice. They always display, you control the look, and the karaoke-style word highlight keeps mobile viewers engaged. For maximum coverage, use both: burned-in subtitles in the video + upload the SRT file to YouTube as captions.
Step-by-step: generate auto-synced subtitles
Generate your voiceover first
Subtitles are generated from the same source as the voiceover — your script. When the AI reads your script aloud, it produces two outputs at the same time: the audio file and a time-stamped subtitle file (SRT format).
Open the Generate Voice section, pick a language and voice, and click Generate. The subtitle file is created automatically in the background — no extra step needed.
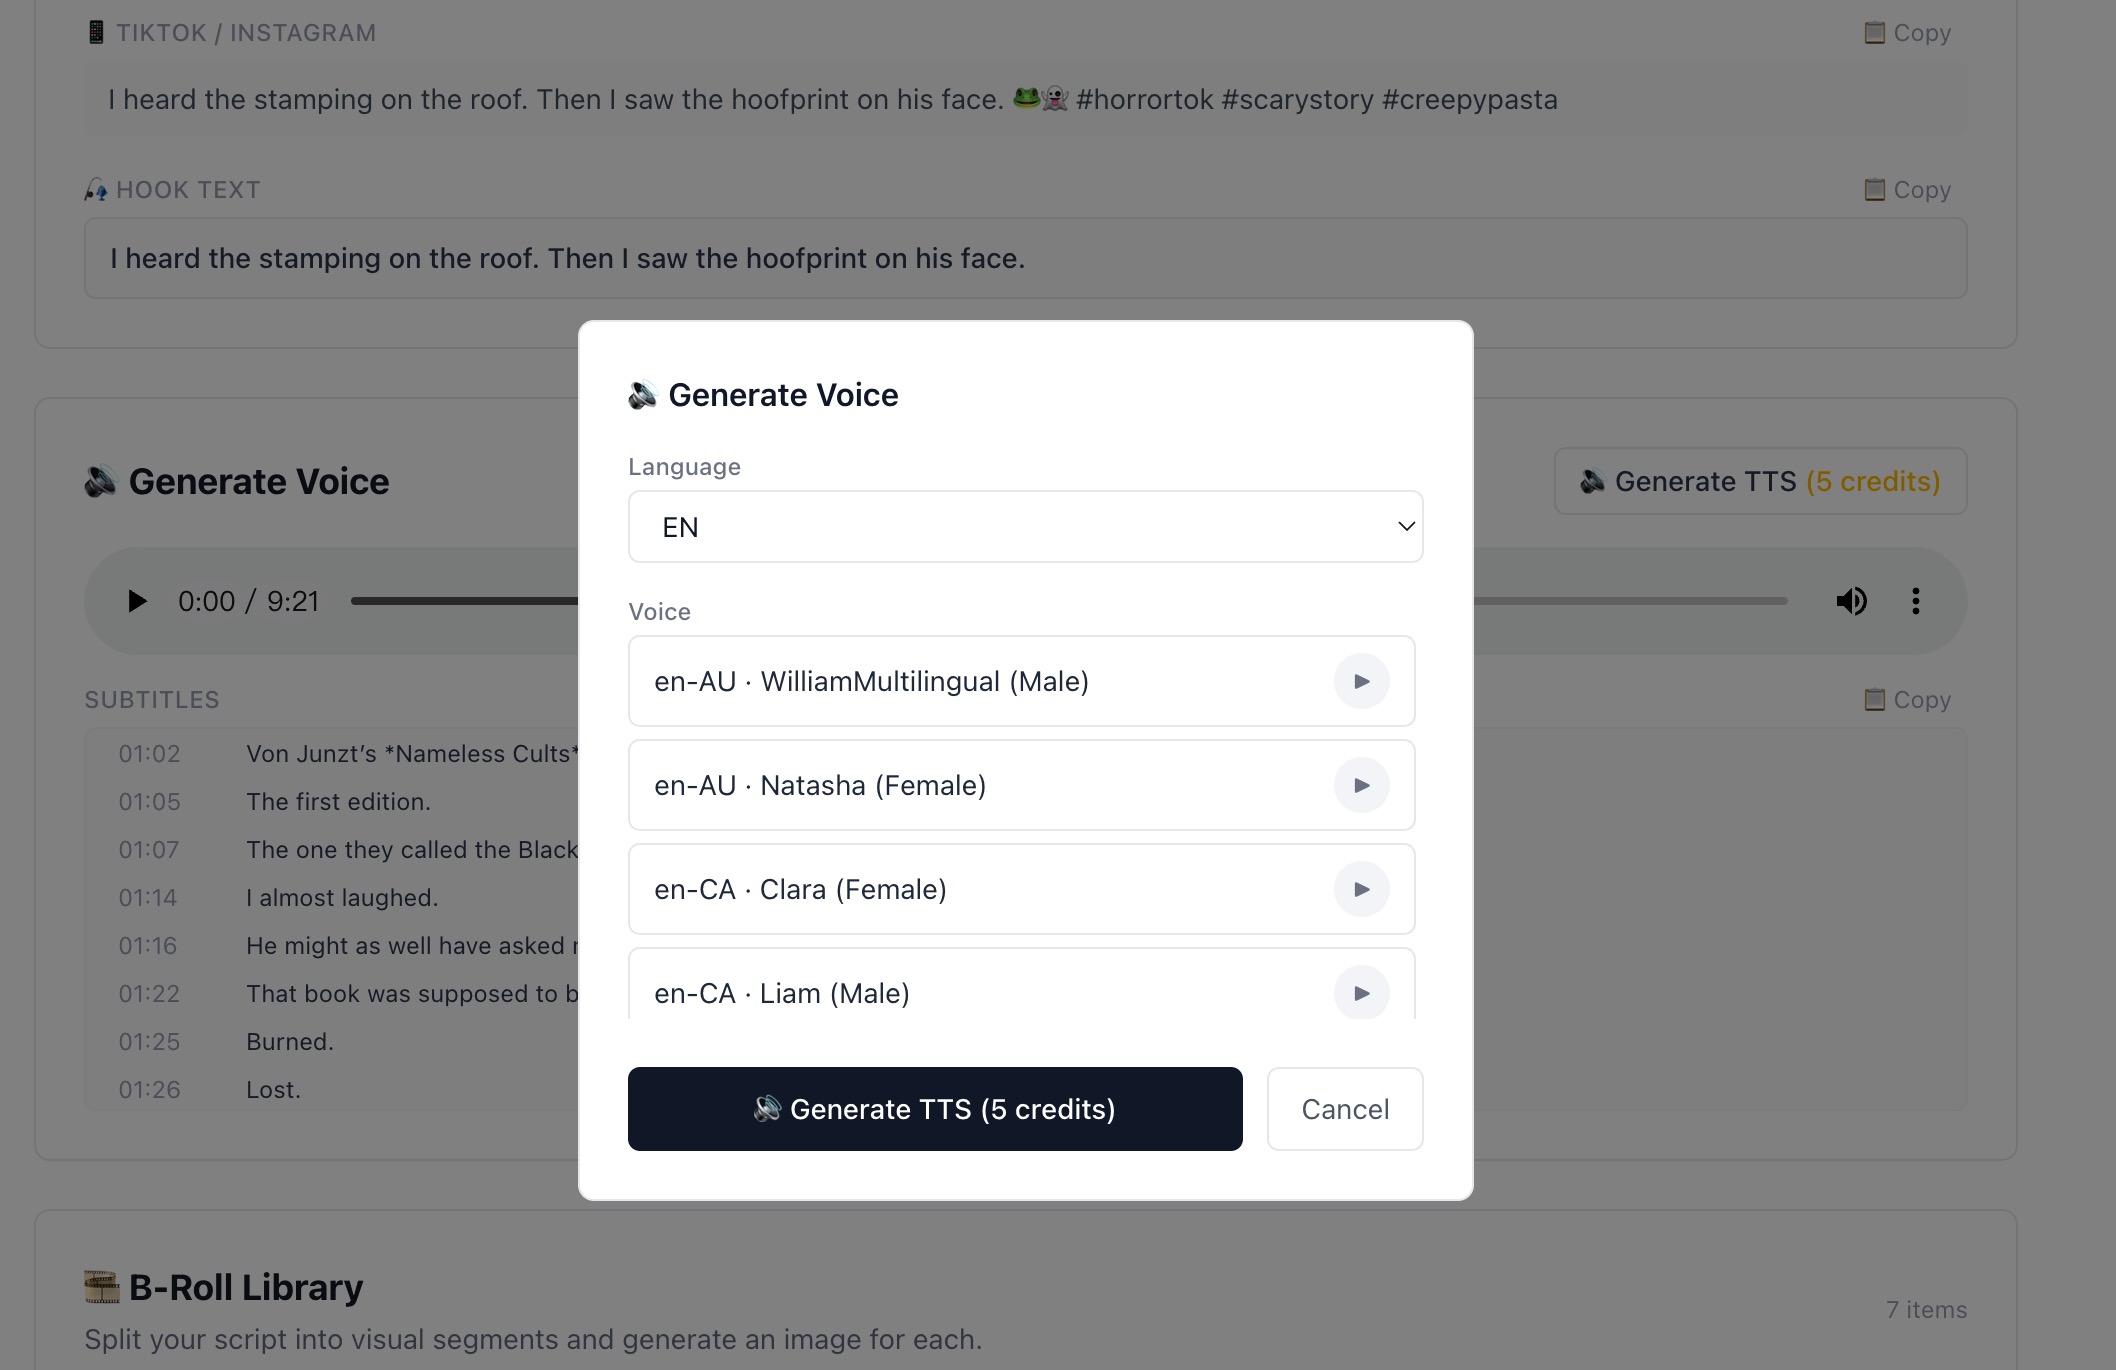
Generating voiceover automatically produces the subtitle file at the same time.
Configure subtitle appearance in the Export tab
When you export your video, you get full control over how the subtitles look. Open the Export Video tab and find the Subtitles settings:
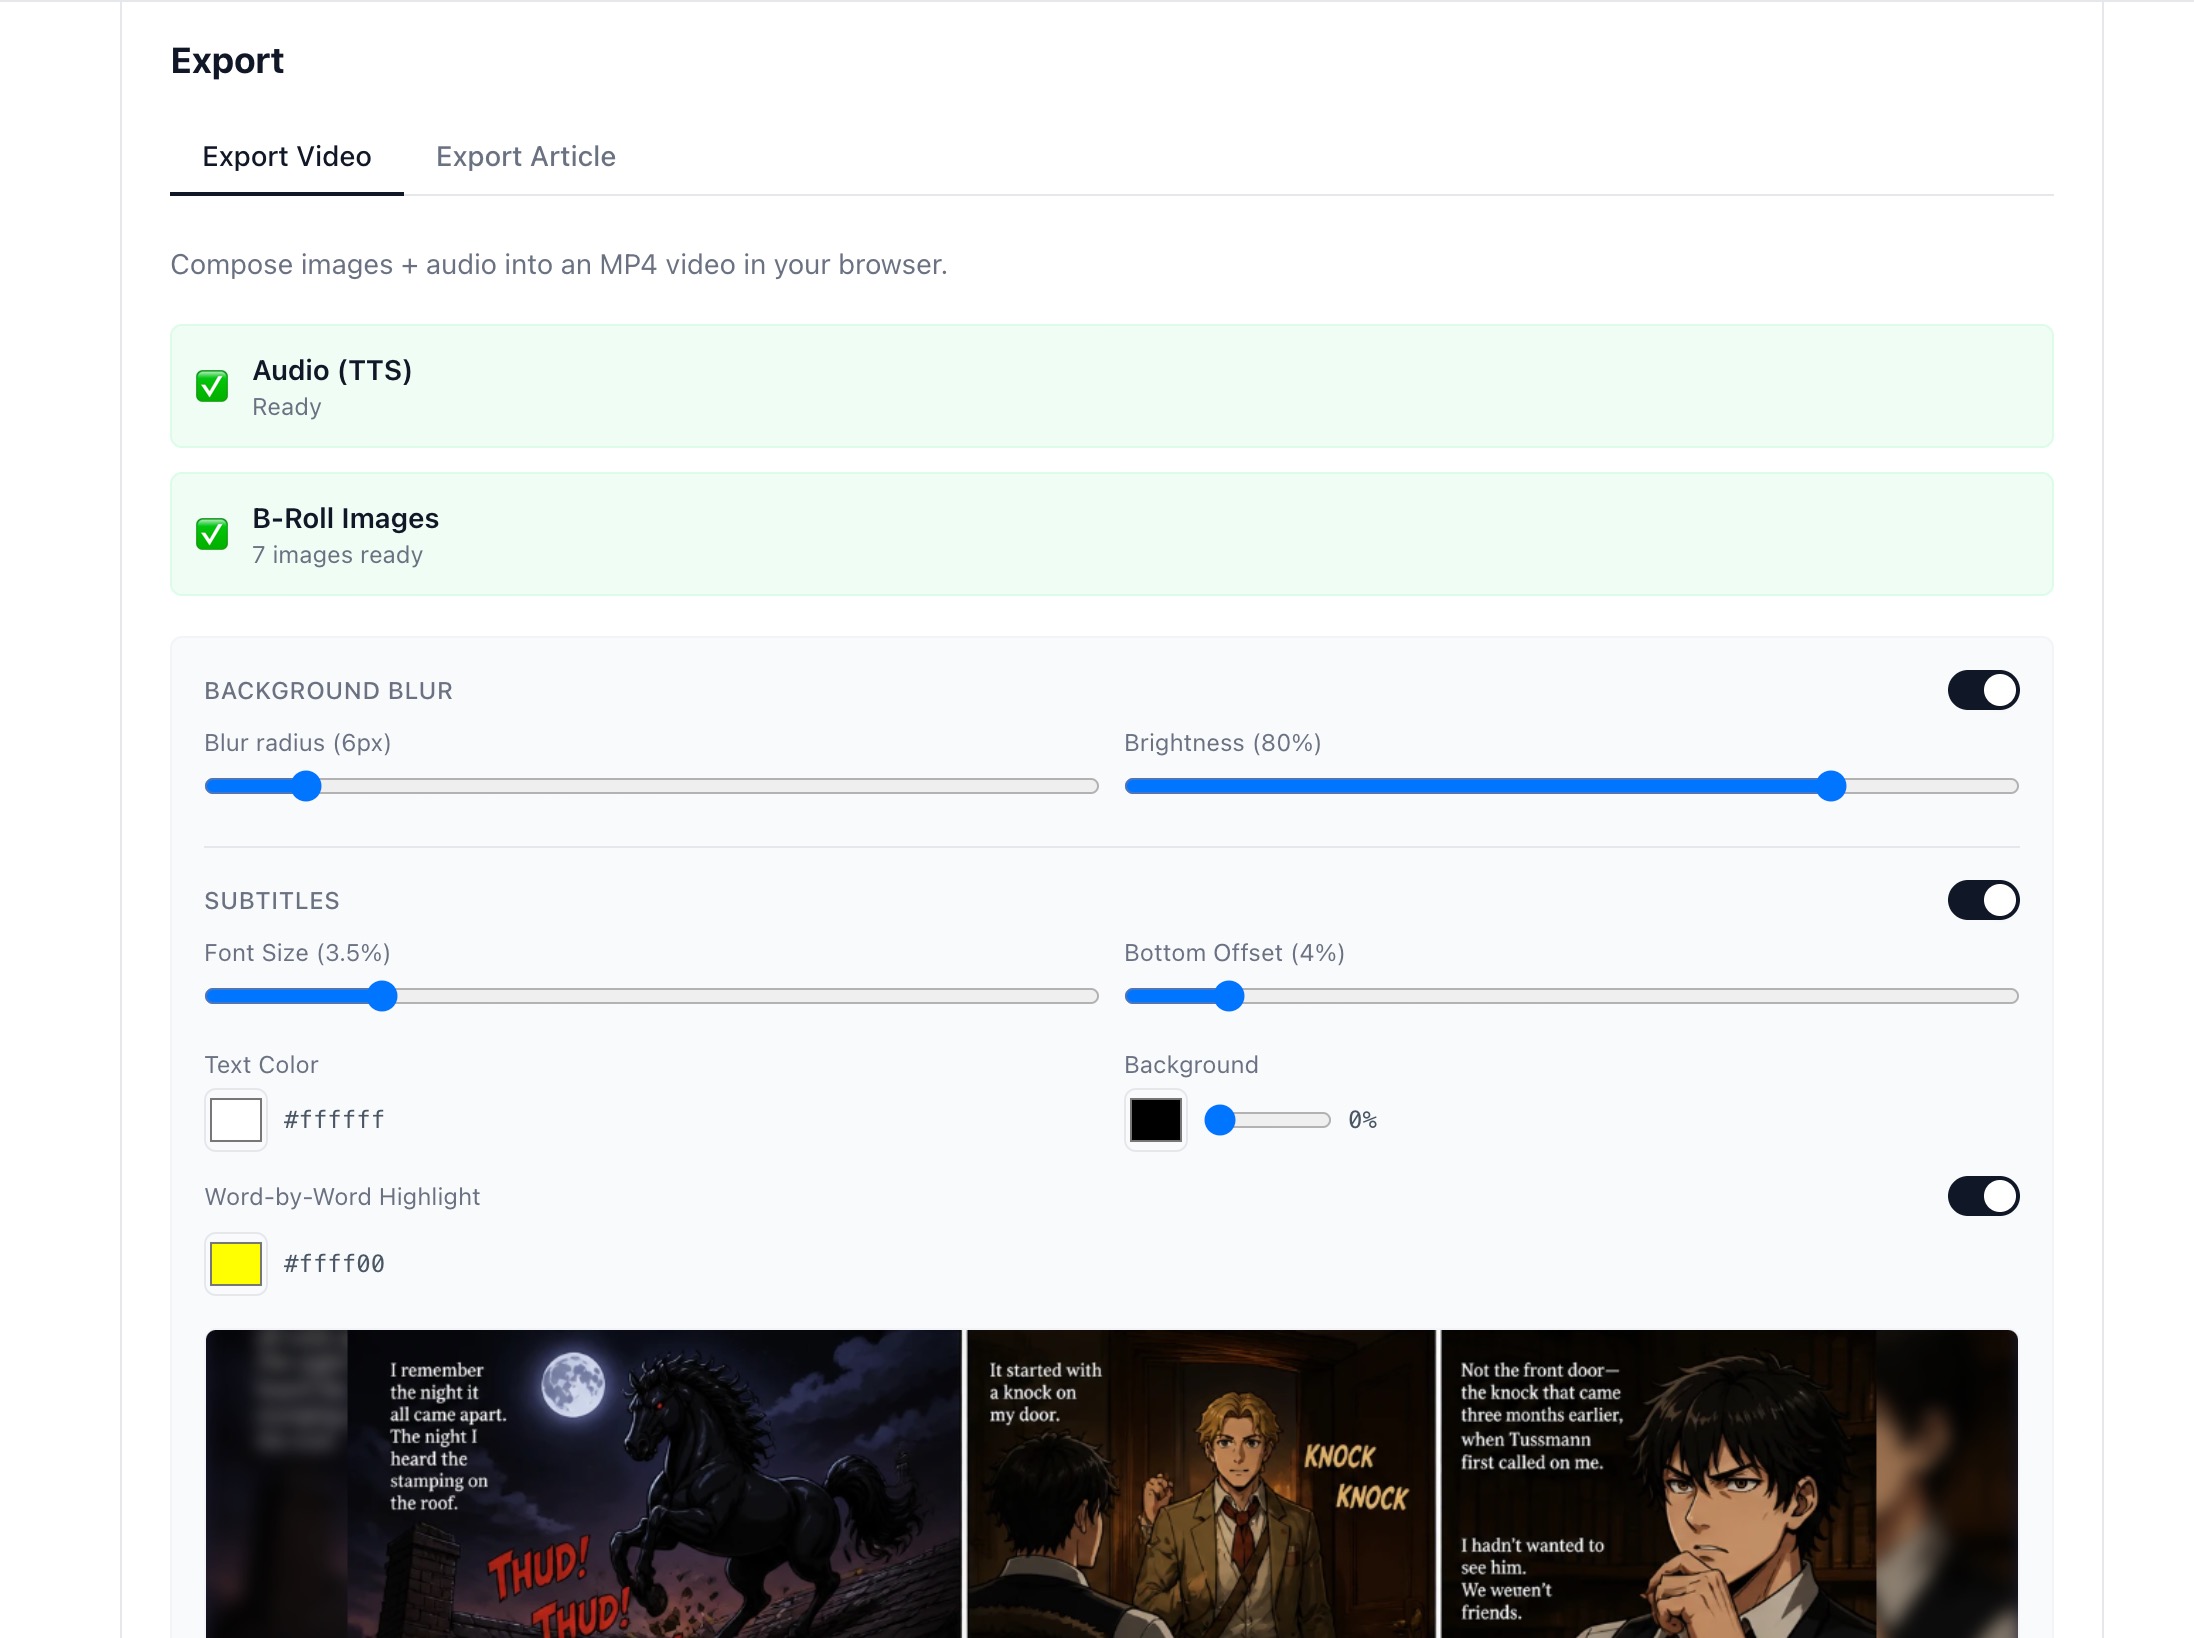
All subtitle settings — size, position, color, background, and word highlight — configured before export.
Fine-tune each setting
Font Size
3–4% works for most content. Go larger (4.5–5%) for short-form vertical video where viewers hold the phone close.
Bottom Offset
4% puts subtitles just above the bottom edge. Increase to 8–10% if you have a lower-third graphic or a progress bar.
Text Color
White (#ffffff) is the standard. Yellow works for retro or horror aesthetics.
Background Opacity
0% for clean look on bright images. 40–60% dark background on images with mixed backgrounds to improve readability.
Word-by-Word Highlight
Enable this. The highlighted word tracks the current spoken word — exactly like TikTok and Instagram Reels. This feature alone measurably improves watch time on short-form content.
Should you also upload SRT captions to YouTube?
Yes — do both. After exporting your video, you can also download the SRT subtitle file and upload it to YouTube Studio as captions. This gives you:
- › Better search indexing — YouTube reads the captions to understand video content
- › Accessibility compliance — required for some advertiser categories
- › Auto-translation — YouTube can auto-translate your captions into other languages for international viewers
Add subtitles to your next video — free
Voiceover, subtitles, and video export — all handled automatically. 50 free credits at signup.
Start for Free