From Script to Published YouTube Video in Under 30 Minutes A Complete AI Workflow
Most creators waste hours bouncing between a writing app, a recording setup, a stock photo site, and a video editor. This workflow eliminates all of that. Here's how to go from zero to a finished video using only AI — in one session.
The problem with the traditional video workflow
Here's what producing a single YouTube video used to require:
That's 5–7 hours of work for a single video. The AI workflow below cuts that to under 30 minutes — and produces a result that looks just as good.
The full AI video workflow — step by step
Generate your script (2 minutes)
Click "AI Generate" and type your topic. Set the duration (3–5 minutes is ideal for a first video) and choose a style — Voiceover works for most niches.
The AI writes a complete script with a hook, body, and conclusion. If it's not quite right, you can edit it inline or use "Rewrite" mode to rephrase the whole thing in a different style without losing the content.
Generate your YouTube meta (1 minute)
Before you record the voiceover, generate your YouTube metadata. The AI reads your script and produces a title, description, hashtags, a TikTok/Instagram caption, and a hook line — all optimised for YouTube search.
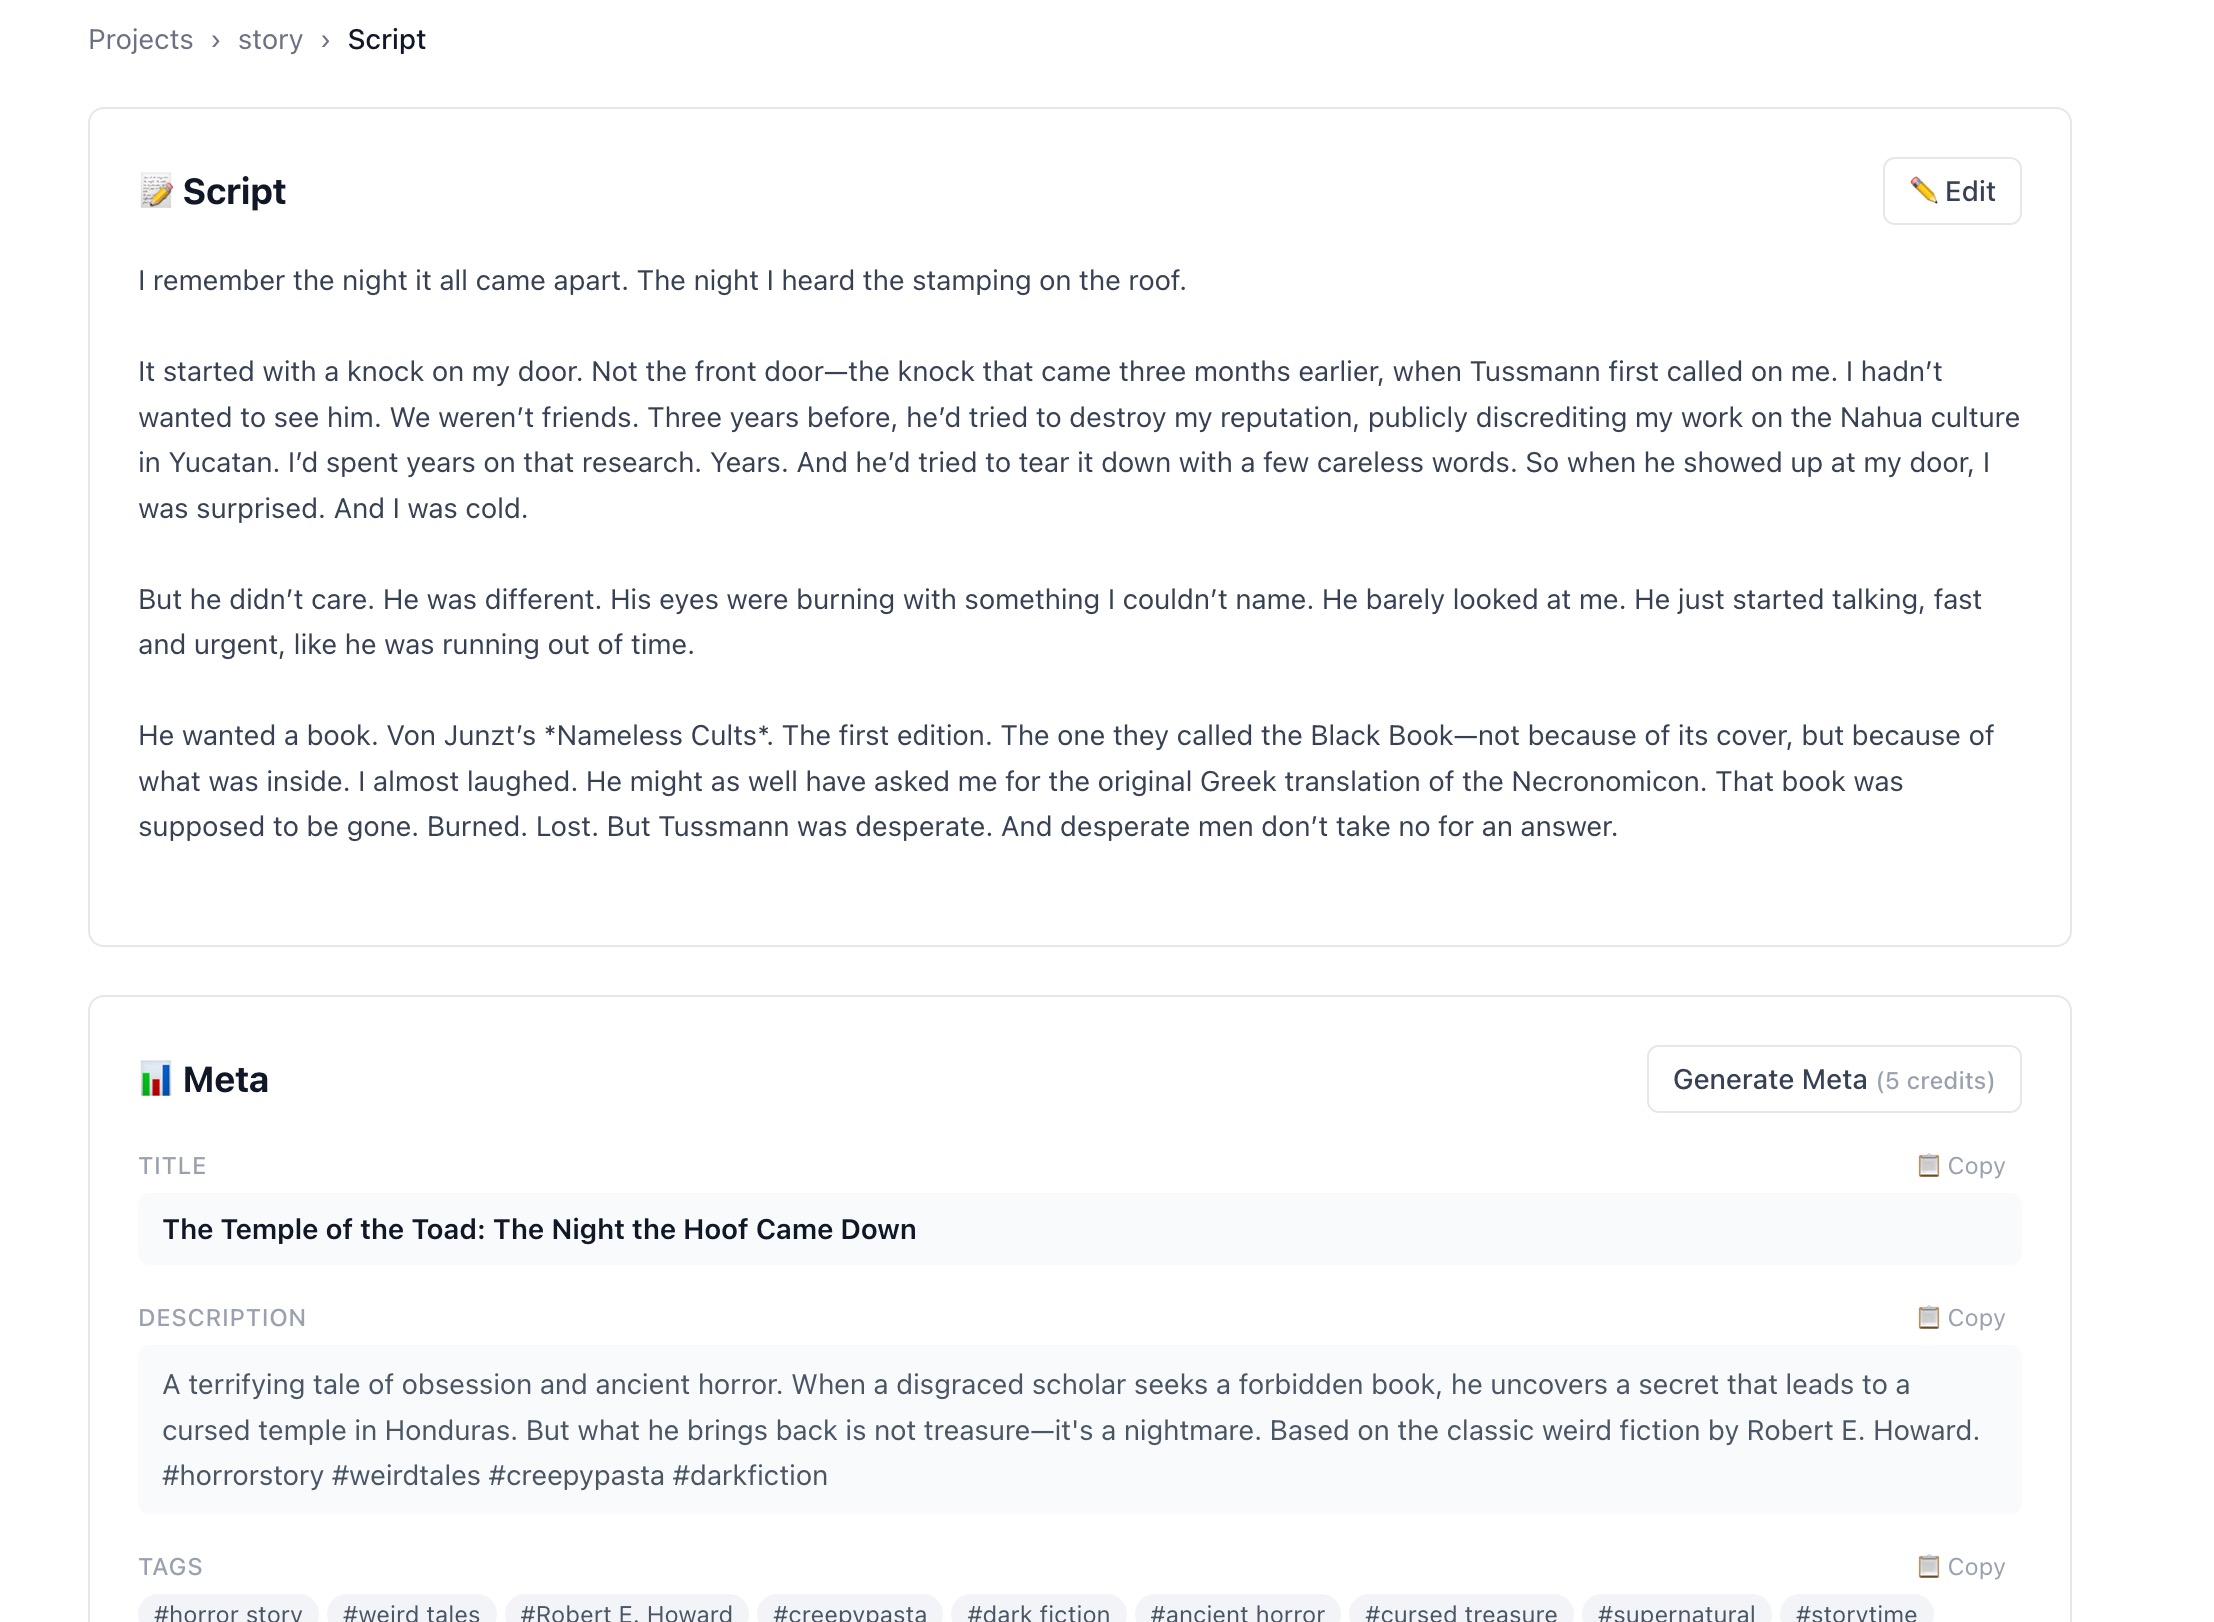
AI generates your YouTube title, description, tags, and hook text from your script in seconds.
Generate your voiceover and subtitles (2 minutes)
Go to the "Generate Voice" section. Pick a language and voice — you can preview each voice before committing. Hit generate. The AI reads your full script and produces an audio file with a synced subtitle track (SRT format).
The subtitle file is used later in the video export. It shows each word on screen in sync with the audio — no manual timing required.
Build your B-Roll image library (5–10 minutes)
Go to the B-Roll Library. Set how many characters per image (around 500–700 is a good starting point for a 3-minute video). Pick a visual style. Click "Split Script into Segments".
The tool automatically divides your script into segments — one image per section. Then you click "Generate Image" for each segment. Images take about 30 seconds each. You can generate them all in parallel if you click quickly.
Export your video (2–3 minutes)
Go to the Export tab. Set your subtitle style — font size, color, background, and whether to highlight each word as it's spoken. Click export. Your browser assembles the video from the images and audio and downloads an MP4.
Choose your aspect ratio before exporting: 16:9 landscape (1920×1080) for YouTube, or 9:16 portrait (1080×1920) for TikTok and Reels.
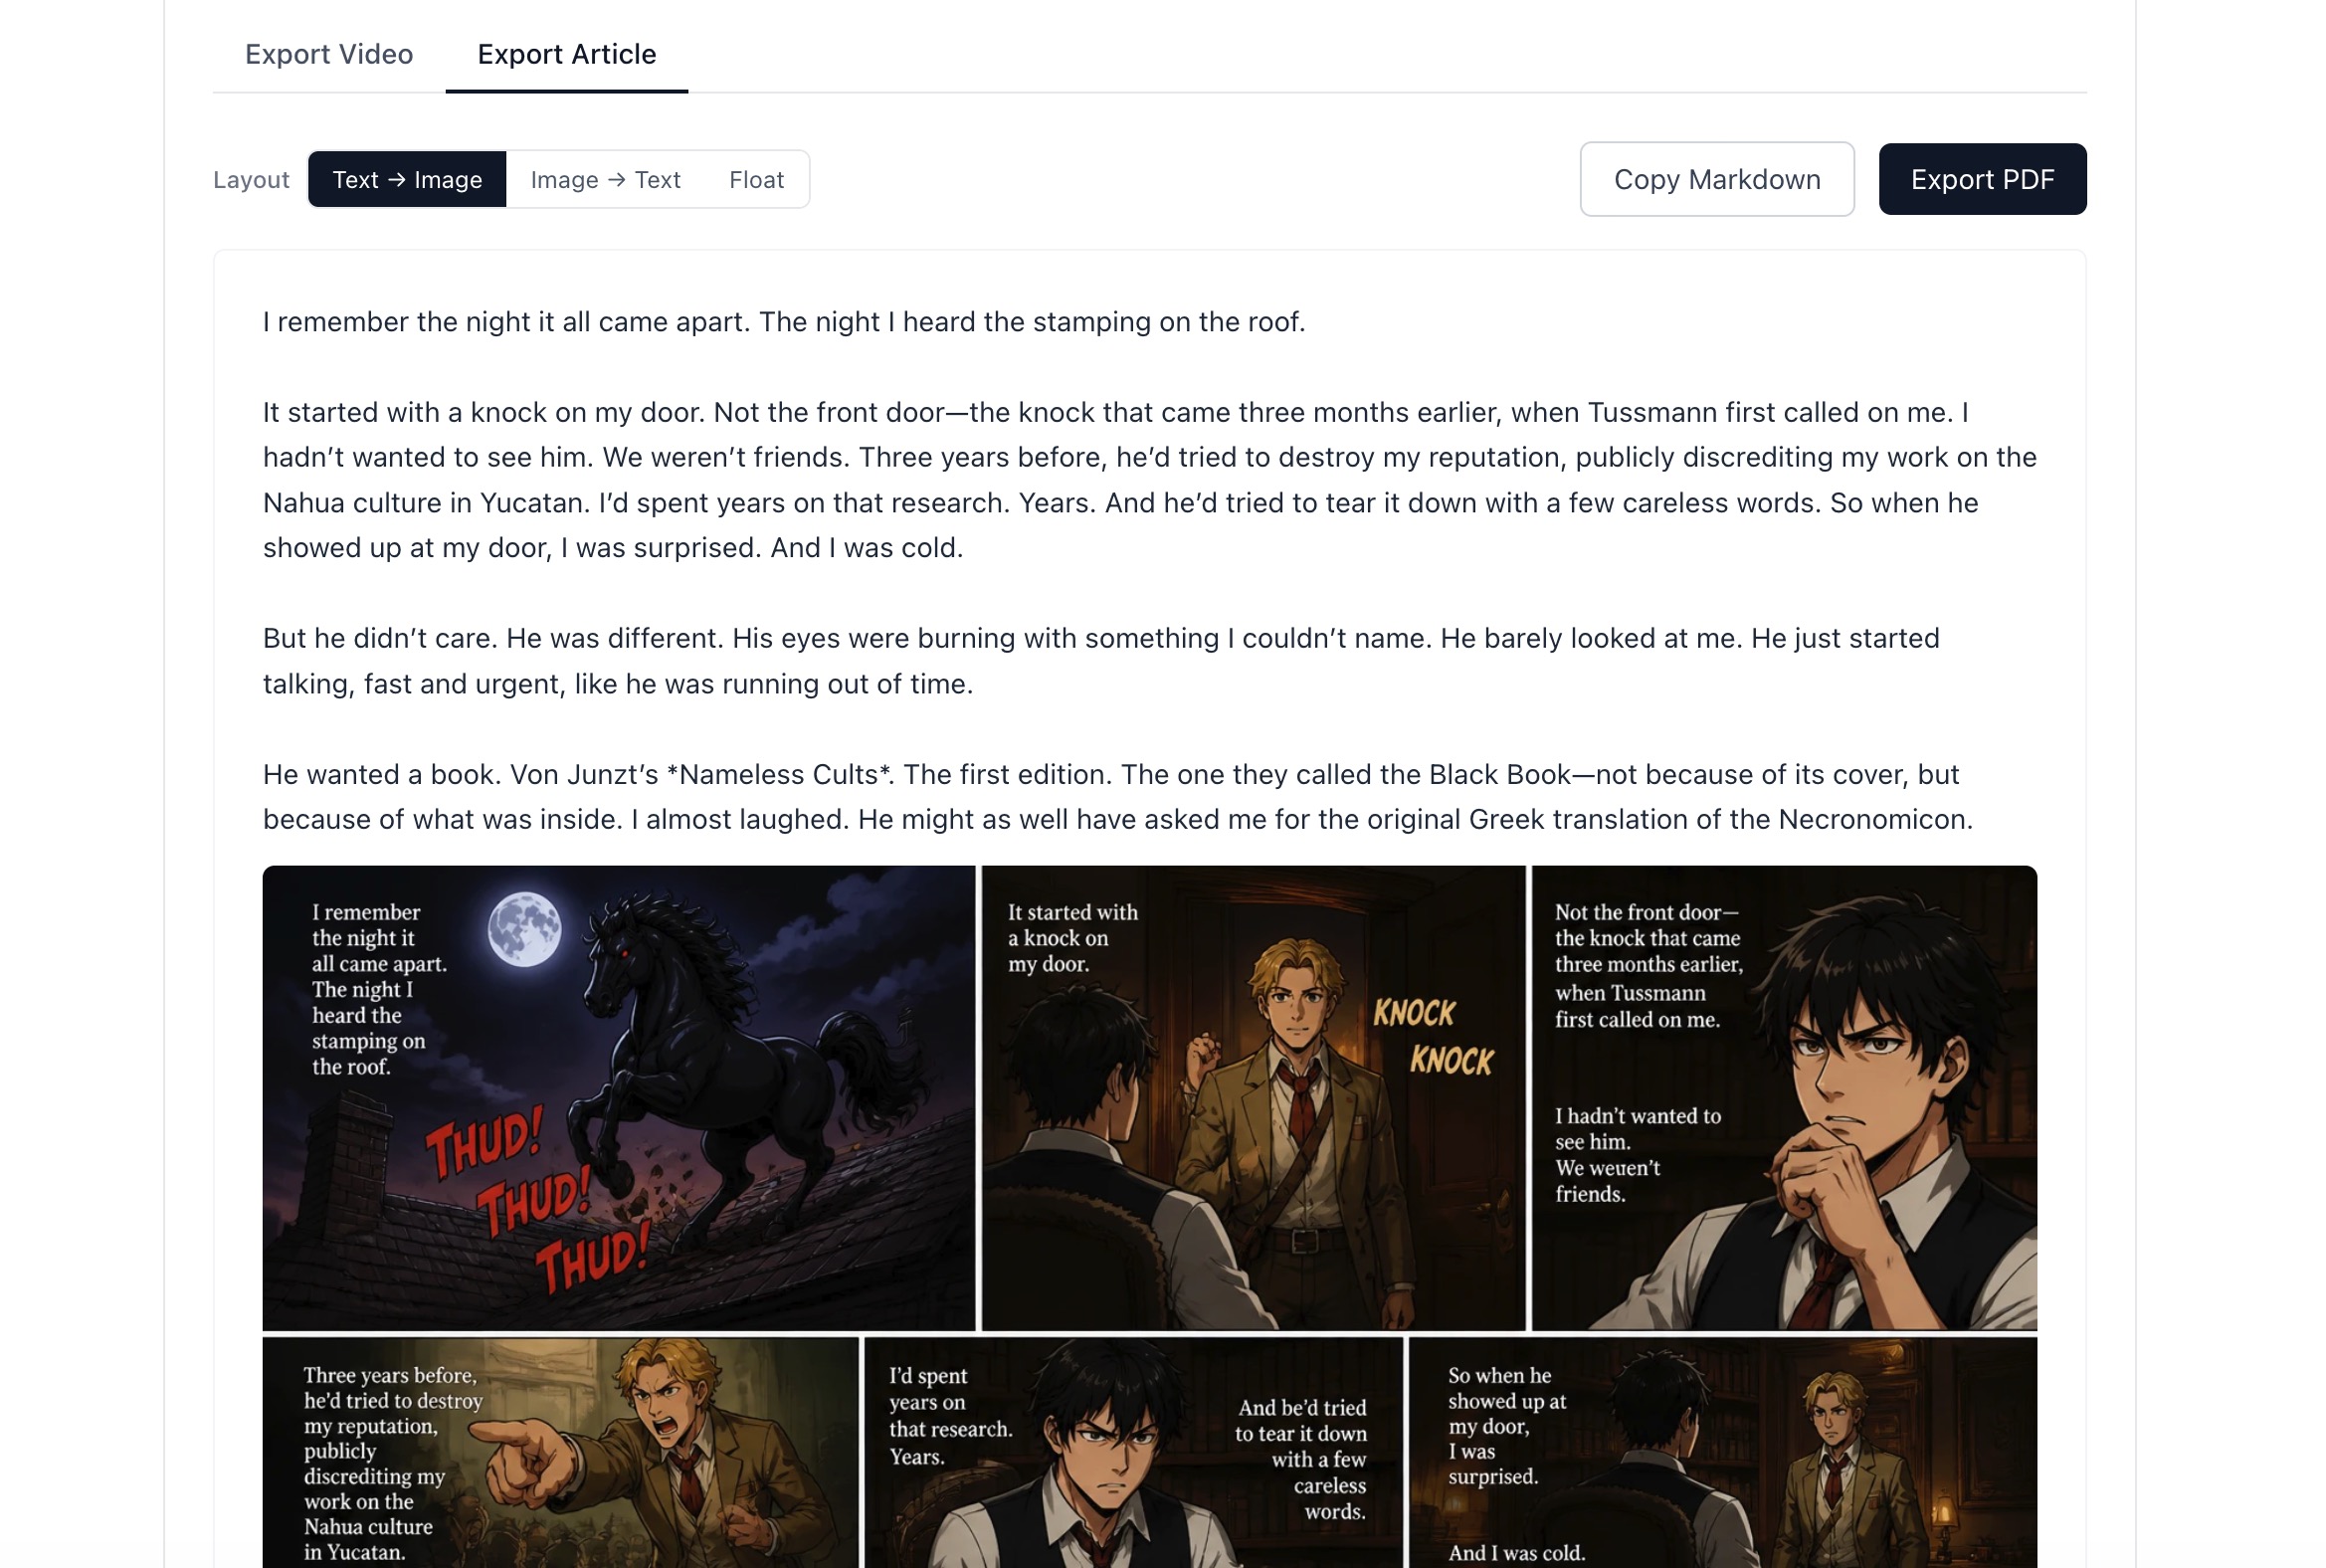
The same content also exports as a formatted article — useful for blog posts or LinkedIn.
Your quick-reference checklist
- ☐ Write or generate script → review and edit
- ☐ Generate YouTube meta (title, description, tags, hook)
- ☐ Pick a voice and generate voiceover + subtitles
- ☐ Split script into B-Roll segments
- ☐ Choose image style (keep it consistent)
- ☐ Generate all B-Roll images → regenerate any bad ones
- ☐ Set subtitle style and export MP4
- ☐ Upload to YouTube with the AI-generated title and description
Bonus: Export the same content as a blog post too
Once your B-Roll images are ready, you can also export the content as a formatted article. The "Export Article" tab shows your script text alongside each image, and you can copy the whole thing as Markdown or export it as a PDF.
This means one session can produce both a YouTube video and a blog post at the same time — two pieces of content from the same workflow.
Try the workflow yourself — free
50 free credits at signup. Enough to produce your first complete video from scratch.
Start for Free